Showing posts with label Tim Holtz. Show all posts

Saturday, August 26, 2017

Gate Fold Birthday Card


Hi Friends,  Here's a fun and funky masculine gate fold birthday card I created for my grandson.  I really loved the rustic wooden theme these simple papers created.  I used basic kraft cardstock to create the base and framed up the wooden papers with dark brown and light blue.  I used Prima's chalk paint in robins egg to randomly distress the card inside and out.   For a closure, I popped up a square piece of corrugated cardboard and added a Tim Holtz latch.  For this card, I decided to decorate the inside as well.   Here's a peek: 

The ruler paper makes a great background to the sentiment and I love how a bit of zigzag sewing really makes a card pop.  I've had a hard time finding a style that my youngest grandson really likes and this one was a big hit!    Thanks for dropping by and having a peek.   Hugs ~ Dawna

Friday, April 3, 2015

Romantic Parisian Inspired Envelope Mini Album

Morning Friends,


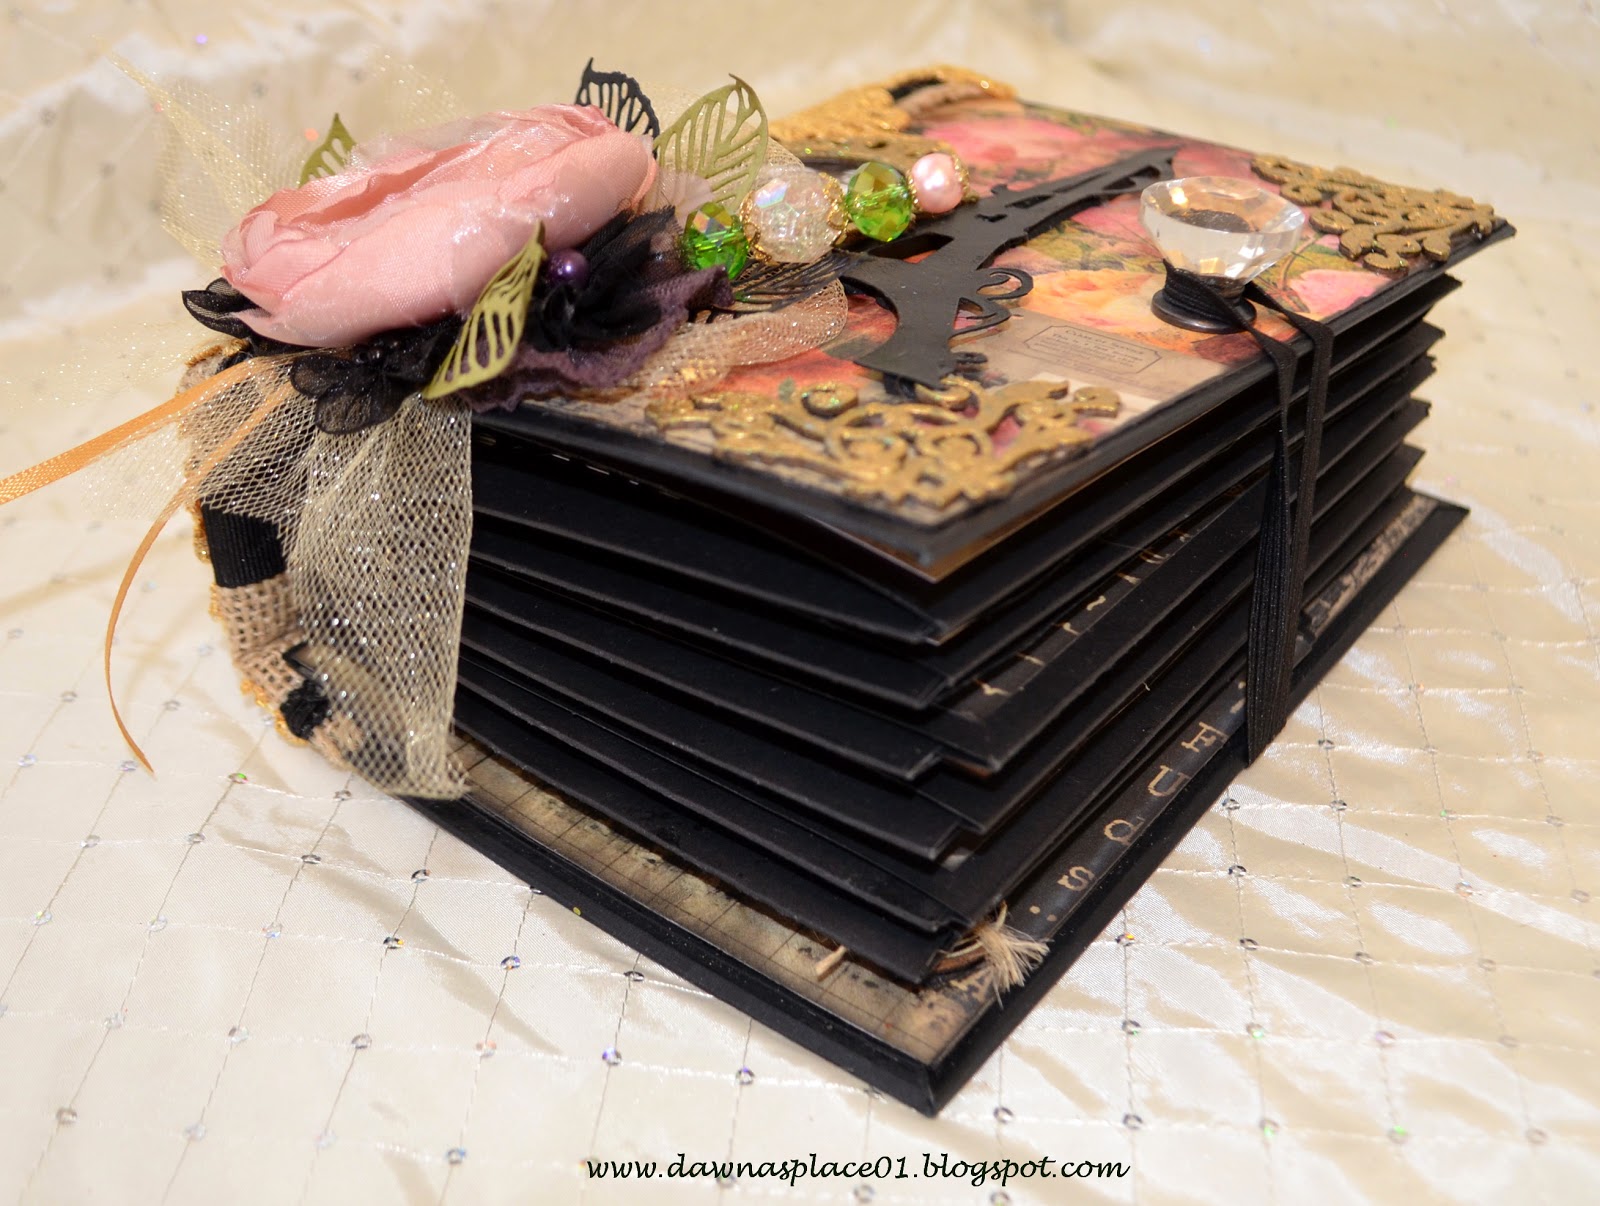
Today I'm sharing this pretty vintage style envelope mini album I created for my dear friend Susie (aka Scrap Smart) in a swap being hosted by Ilovepapillons at sb.com.  Susie loves all things vintage and feminine so I decided to use a mix of two of my favorite paper collections (Prima's Romance Novel and Marion Smith's Garment District) to make her this romantic vintage style, Parisian inspired envelope mini album.  
Side view of envelopes and cards assembled
The album cover measures 8x6 with a 3 inch spine.  The envelope pages were created using 6 each standard A7 black envelopes.   And the photo wallets with photo waterfalls were created from the A7 cards.  Once assembled there is enough room for 54 matted photos, and 23 journaling tags.  That's plenty of room for Susie to document whatever her heart desires!  
Finished Envelope Pages with File Folder Photo Wallet Cards
To create the envelope pages, the envelope flaps were sealed closed first.  Then all four sides were trimmed down by 1/8." The front and back of the envelopes were covered with distressed paper leaving a 1/4" frame.  Then I closed up the top and bottom of each envelope by scoring a 3" wide strip cardstock in half, punching it with a Martha Stewart daisy edge punch.  I burnished the fold then sandwiched the open envelope ends back together by gluing the daisy strips to the outside of the envelopes to close them back up.  This allowed the photo wallets to fit snugly into their envelopes without any slop.  The punched  bottom boarders double as stops for the journaling tags and the decorated burlap belly bands hold the tags safely in place.   Finely, the remaining open envelope bottoms were secured with score tape over the spines hidden hinge binding system.    The only opening left is the outside for holding the photo card wallets in place. 
  Envelope Pages Sandwiched Back Together with Daisy Punch Strips
The photo wallets were created from the A7 cards.  I used the We Are Memory Keepers Envelope Punch Board tool to create two sets of three staggered file folder tabs for words.  I left the left side of the cards straight so they fit flat and evenly inside their envelopes against the hidden hinge. 
Outside File Folders with Word Tabs
Inside File Folders with 3 Tier Photo Waterfalls
Photo Card Wallet out of its Envelope
I covered the left inside of the cards, front and back outsides with distressed paper leaving a 1/4" frame (see above).  The right inside of the photo card wallet features the 3 tier photo waterfall (also, see above). 
File Folder Tabs Facing Spine
When the cards are in their envelopes, the tabs face towards the spine (see above) to prevent the tabs from getting tattered by the elastic loop closure or by repeated use (see below).  
Elastic Loop Closure
Now that you have a good idea of how the album was created, lets look through its lovely pages:
Page 1 Folded Out
Page 2 Folded Out
Page 3 Folded Out
Page 4 Folded Out
Page 5 Folded Out
Page 6 Folded Out
Inside of the Back Cover
The inside back cover has a large deep pocket which has been popped up with foam tape to create enough depth to hide the metal tip of the elastic closure loop.  The outside of the back cover is sweet and simple:
Back Cover
Now lets have a closer look at the front cover:
Front Cover
The front cover features a sweet picture of Susie and her dear husband in the foreground of the Eiffel Tower.  The wooden frame and chipboard corners were embossed with gold to go with the gold lace covering the album spine.  A pretty crystal knob and elastic loop act as a closure to keep everything nice and neat,    The cover was embellished by layering a vintage Prima flower, with Prima's filigree leaves, a few black Prima bumper flowers, a gold tulle bow, gold ribbon, and a handmade stickpin.    
Finished Spine
The spine is decorated by layering it with burlap, black ribbon and has a back to back layer of gold Venice lace.  As a final touch, a chunky brass charm adorns the spine with Parisian and vintage inspired tassels, chains and trinkets.  
Chunky Charm Close Up
Well friends that's it for me today.  Wishing you all a wonderful Good Friday!  Until next time, create something beautiful from your heart and choose to live your  life inspired!  Big Hugs ~ Dawna 


Saturday, January 31, 2015

Our Story

Hi Friends,

One more layout from Teresa Collins sweet Summer Stories paper collection.  Teresa's signature style is clean and simple, which I love, but I thought I'd grunge it up a bit by distressing  this one.  I started with a background cut from the Paper Lace Cricut Cartridge, turned over the center circle and popped it up to layer my photo mats.  
I did make things easy on myself by using several ready made Prima flowers and leaves thought out my three flower clusters.  The big pink and black script flowers were handmade from Tim Holtz's Tattered Floral die. I love his die and the flowers it creates! 
To finish things of I inked the edges and sewed around the layout.  I also distressed the 'Story' chipboard pieces.  As we take one last look at the whole page you can see that I added more chipboard in the lower left corner and added a little 'photo' ticket next to the photo mat.
I enjoyed working with all the different colors in the 'Story' banner, but I have to admit that I'm not too sure about distressing papers that are styled for the clean and simple look.  Like all things artsy, I'm sure it will probably grow on me though!  

Well that's it for me today.  I hope you enjoyed this share and that you'll consider joining the site to see what comes next.   Have a happy day dear friends!  Big Hugs ~ Dawna

Sunday, November 16, 2014

BELIEVE Holiday Blocks


 Morning Friends,

Can you "BELIEVE" it, the holidays are upon us!   Where did the year go?   This morning I'm kicking off the holiday season by sharing my last friendship swap gift for my dear friend Debbie.  She loved getting them and is threatening to keep them up all year round!  Hey, Christmas in July is allowed!   Right?  lol 

Here's a few more close up pics I hope you enjoy:

Tim Holtz Tattered Poinsettia

This display is about 30" Wide

Close of Holly Berry Block

Add a little lighted greenery to complete this centerpiece and BELIEVE! 

Well friends that's it for me this morning. For a list of supplies, please visit my gallery, Dawna's Place at Scrapbook.com.  

Undecorated painted blocks are available in stock at my Etsy for $3.00 each or decorated blocks can be special ordered for $6.50 each.   Undecorated blocks ship immediately, decorated blocks can be customized for Christmas, Hanukkah or any other special occasion and require 7-10 days to ship.   

Thank you for dropping by and enjoy a beautiful Sunday!   ~  Dawna


Wednesday, September 17, 2014

Wedding Anniversary Trip

 Hi Friends,
  
This morning I'm sharing an  easy mini album you can make using your 4x6 post cards and 3x4 Artist Trading Cards (ATC's).   This little treasure will have you thinking up all kinds of occasions you can stash in this beautiful, yet simple, easy and fun way to keep memories! 

Let me start by saying that this is a companion to a vertical paper bag tutorial I did of our Wedding Day.  Both albums are made from Prima's Stationer paper and embellishments. The Wedding Album has a step by step tutorial and is for more advanced crafters.  This mini album is for all skill levels, so a little something for everyone! 

While I still need to add journaling to this mini, lets get take a look at some close ups then I'll finish up with a few simple "how to" instructions.

       
29th Wedding Anniversary Dinner View
Beachfront Restaurant and Hotel
Dini's by the Sea Restaurant, South Carlsbad, CA
Richard and I all fat and happy from dinner!  lol
Sunset at Camp
Morning Lookout Over the Cliffs
Enjoying the Surf
Four Hours of Surf = One Happy Guy!
Cloudy Evening Sunset

Home Sweet Home


Cliff Side View

Sunshine & Rummy Cube

Beautiful Evening Sunset
Sunset Over the Campground
Evening Fireside
South and Southwest Ocean View

South & Northwest View
Northern Fence Line View

Back Cover and Trinket Chain
Well Friends, that's it for my goodies today.  The remainder of this post is for a supplies list and a few simple steps on how to create one of these mini's.

Thank you  for dropping by to have a look.  If you haven't been by before, please feel free to "follow" this blog or sign-up for emails to see whats next.  If you have a minuted to leave a comment, I'd love to know you were by for a visit!  Enjoy your day and I hope your inspired to create something from the heart!  Hugs ~ Dawna
 

Supplies List

1 pk 4 x 6 Post Cards
1 pk 3 x 4 ATC Cards
Adhesive Runner
White Glue
Eyelets
Crop a Dillie
Paper Trimmer
2 ea 2" Clasp Rings
Prima Resin Frame
Two Wooden Doves Stained Walnut
Wink of Luna Pen in Metal
Walnut Stain to Antique Metal Colored Frame
Foam Tape to Lift and Adhere Frame on Three Sides
3 ea. Black Roses
2 ea. Red Roses
2 ea. Cream Roses
Stickles
3 ea. Green Leaves
4 ea. Stick Pins
2 ea. Brass Corners for Front Cover Edges
Tim Holtz Clasp Chain & Selection of Personalized Trinkets - Attach to Chain with Jump Rings 
Jute Sting
4 Types of Ribbon to Finish Off Rings & Use on Tags
Corner Rounder (optional)

Directions

Chose your favorite images for the front and back covers and set aside.  Using a 4 x 6 scratch card stock to create a template for your front cover.  Use your Crop a Dille to make 3/16" hole at 1 and 1/2" from the right side and left side of the card at 1/2" away from the top edge.  Mark both spots for holes and set your orange Crop a Dillie slide stop at 1/2" to stop the top of each card at the same depth with each punch.  You will use this set up to punch all your cards after they are prepared.  Note that pictures are mounted directly onto these cards, there is no special framing or matting, making this super easy!

Now lets assemble all your pages for punching.  Beginning with your front cover card, adhere two 4 x 6 cards together with adhesive tape, use a corner rounder, if you wish.   Keep your adhesive close to the edges throughout this process.  Set your front cover aside to decorate when your done adhering all your 4 x 6 cards together and punching them. 

Now decide which cards you'd like to use for photos and which cards you'd like to use for pockets.  To create pockets, take your 2 x 3 ATC's and turning them sideways, using your paper to paper glue (not your adhesive tape as it will not hold anything in the pockets without falling apart) glue 3 sides down leaving the top open to tuck in tags.  Repeat until you have created all the journaling tag pockets you'd like to have in this album. 

To make your journaling tags, punch a 3/16" hole with your Corp a Dilie and set an eyelet in the center 1/2" from the top.  Take a 5" jute string, folding it in half, push the fold through the back toward the front of the tag then pull the ends through the loop created.  Pull the jute string until it is snug against the tag.  You can create a 1-3 tags per pocket until you are happy with what you have.  You can alternate the jute for ribbon as you like.  These ATC cards are the perfect size for making these simple journaling tags. 

One you have all your pages punched and pockets made, distress all the pages and their pockets and tags.  You can even use some walnut stain to 'antique' any cream ribbon you choose to use.  Slip a piece of scratch paper into the tag pocket to distress the edge without getting ink on the whole pocket. 

Now its time to do the fun part, the front page!  First take your Wink of Luna "Metal" colored pen and paint the whole front of the frame.  Then use walnut stain to antique the metal color being sure to hit all the nooks and cranny's.  Once dry and allowing enough room for a picture to be inserted into the frame, trim your foam tape along three sides (leave top open) and center it onto your front cover.  Working with your flowers, leaves, and stickpins arrange them into the desired cluster and affix them to the front at the corner of the frame.  Finish off with some Diamond stickles to give it a bit of sparkle.  Add your Claps chain and desired trinkets and voila!  
 
Well there you have it, sweet and simple!   I hope you were able to follow along and create your own mini album to enjoy. If you have questions please feel free to ask and I'll get back with you.  Again thank you for dropping by and may I wish you a perfectly wonderful day! ~ Dawna