As a guest designer for ReneaBouquetes this month, here I created this sweet layout of my kitty Missy. You can find links to the items I used on this layout below:

Showing posts with label Blue Fern Studios. Show all posts
Showing posts with label Blue Fern Studios. Show all posts
Saturday, October 19, 2019
Perfect Love
As a guest designer for ReneaBouquetes this month, here I created this sweet layout of my kitty Missy. You can find links to the items I used on this layout below:


Friday, April 3, 2015
Romantic Parisian Inspired Envelope Mini Album

Today
I'm sharing this pretty vintage style envelope mini album I created for my dear friend Susie (aka Scrap Smart) in a swap being hosted by Ilovepapillons at sb.com. Susie
loves all things vintage and feminine so I decided to use a mix of two of my favorite paper collections (Prima's Romance Novel and Marion Smith's Garment District) to
make her this romantic vintage style, Parisian inspired envelope mini album.
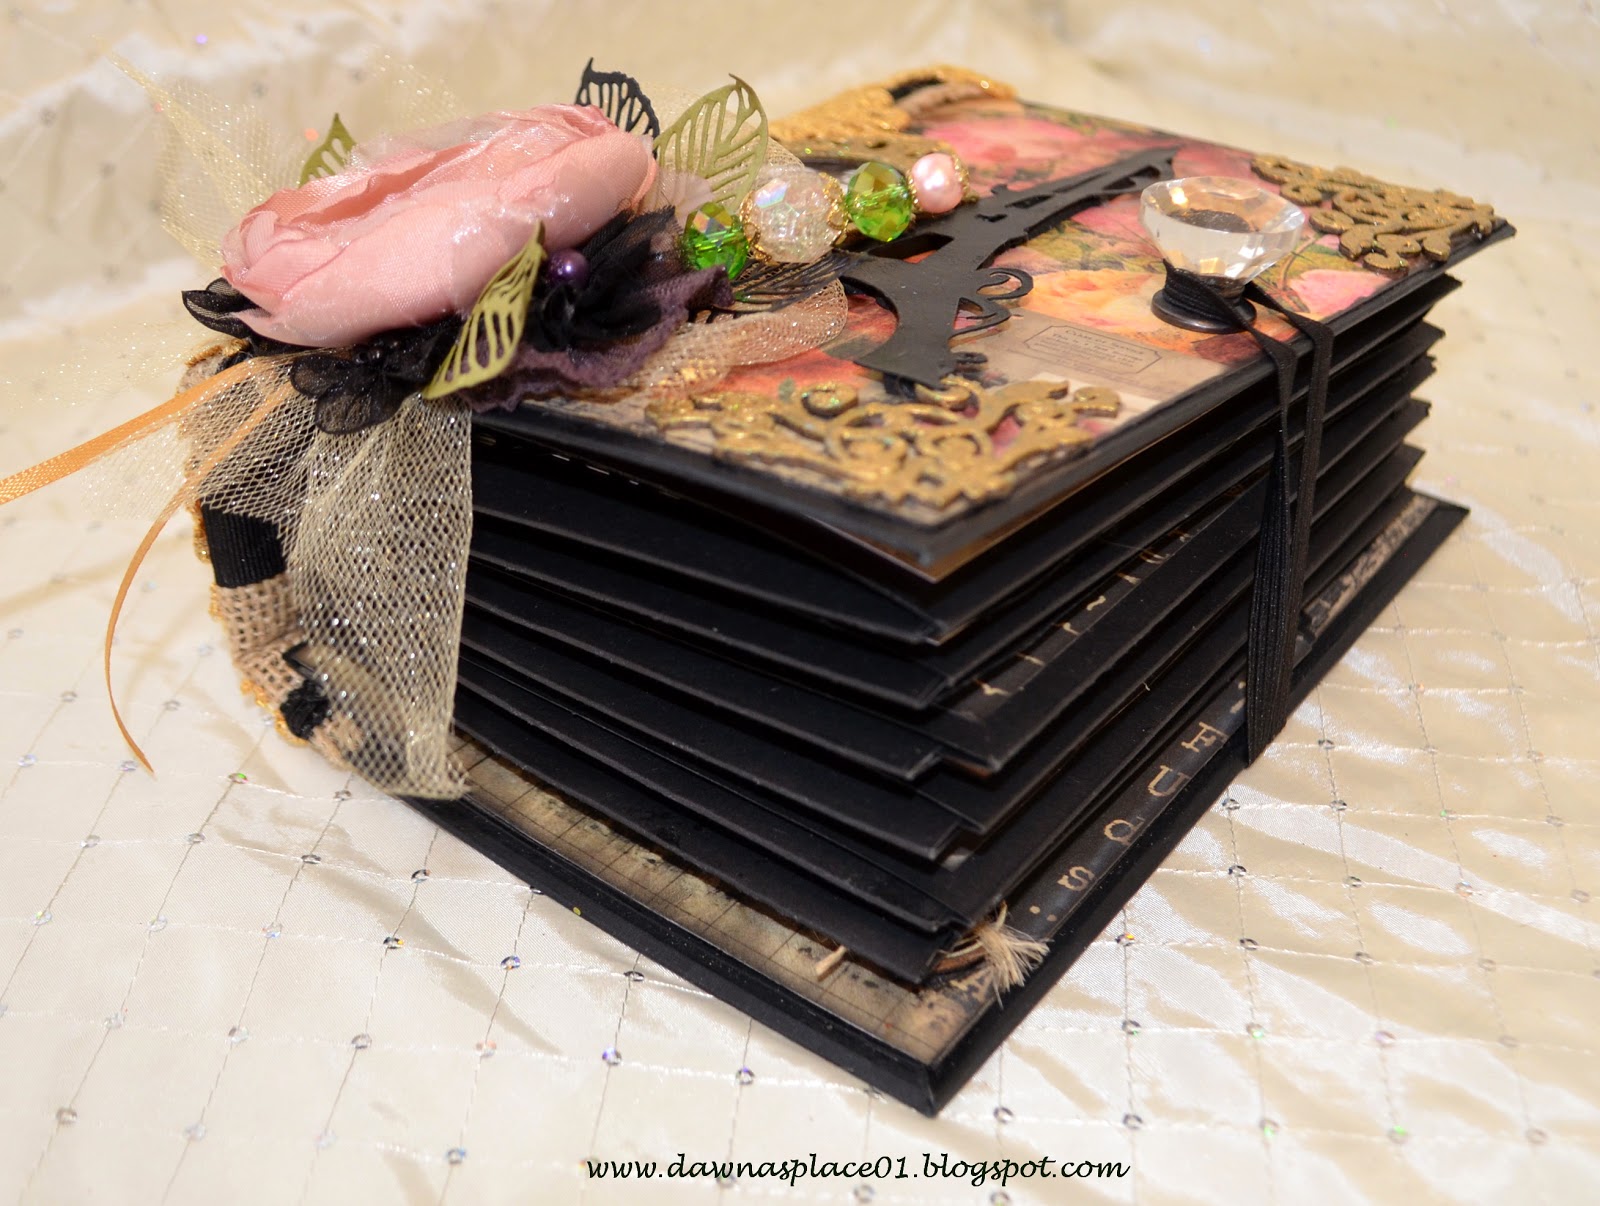 |
| Side view of envelopes and cards assembled |
The album cover measures 8x6 with a 3 inch spine. The envelope pages were created using 6 each standard A7 black envelopes. And the photo wallets with photo waterfalls were created from the A7 cards. Once assembled there
is enough room for 54 matted photos, and 23 journaling tags. That's plenty of room for Susie to
document whatever her heart desires!
 |
| Finished Envelope Pages with File Folder Photo Wallet Cards |
To create the envelope pages, the envelope flaps were sealed closed first. Then all four sides were trimmed down by 1/8." The front and back of the envelopes were covered with distressed paper leaving a 1/4" frame. Then I closed up the top and bottom of each
envelope by scoring a 3" wide strip cardstock in half, punching it with a Martha Stewart daisy edge punch. I burnished the fold then
sandwiched the open envelope ends back together by gluing the daisy strips to the outside of the envelopes to close them back up. This allowed the photo wallets to fit snugly into their
envelopes without any slop. The
punched bottom boarders double as stops for the journaling tags and the decorated burlap belly bands hold the tags safely in place. Finely, the remaining open envelope
bottoms were secured with score tape over the spines hidden hinge binding system. The only opening left is the outside for holding the photo card wallets in place.
 |
| Envelope Pages Sandwiched Back Together with Daisy Punch Strips |
The photo wallets were created from the A7 cards. I used the We Are Memory Keepers Envelope Punch Board tool to create two sets of three staggered file folder tabs for words. I left the left side of the cards straight so they fit flat and evenly inside their envelopes against the hidden hinge.
 |
| Outside File Folders with Word Tabs |
 |
| Inside File Folders with 3 Tier Photo Waterfalls |
|
| Photo Card Wallet out of its Envelope |
I covered the left inside of the cards, front and back outsides with distressed paper leaving a 1/4" frame (see above). The right inside of the photo card wallet features the 3 tier photo waterfall (also, see above).
 |
| File Folder Tabs Facing Spine |
When the cards are in their envelopes, the tabs face towards the spine (see above) to prevent the tabs from getting tattered by the elastic loop closure or by repeated use (see below).
 |
| Elastic Loop Closure |
Now that you have a good idea of how the album was created, lets look through its lovely pages:
 |
| Page 1 Folded Out |
 |
| Page 2 Folded Out |
 |
| Page 3 Folded Out |
 |
| Page 4 Folded Out |
 |
| Page 5 Folded Out |
 |
| Page 6 Folded Out |
|
| Inside of the Back Cover |
The inside back cover has a large deep pocket which has been popped up with foam tape to create enough depth to hide the metal tip of the elastic closure loop. The outside of the back cover is sweet and simple:
 |
| Back Cover |
Now lets have a closer look at the front cover:
|
| Front Cover |
The front cover features a sweet picture of Susie and
her dear husband in the foreground of the Eiffel Tower. The wooden frame and chipboard corners were embossed with gold to go with the gold lace
covering the album spine. A pretty crystal
knob and elastic loop act as a closure to keep everything nice and neat, The cover was embellished by layering a vintage Prima flower, with Prima's filigree leaves, a few black Prima bumper flowers, a gold tulle bow, gold ribbon,
and a handmade stickpin.
 |
| Finished Spine |
The spine is decorated by layering it with burlap, black ribbon and has a back to back layer of gold Venice lace. As a final touch, a chunky brass charm adorns the spine with Parisian and vintage inspired tassels, chains and trinkets.
 |
| Chunky Charm Close Up |
Well friends that's it for me today. Wishing you all a wonderful Good Friday! Until next time, create something beautiful from your heart and choose to live your life inspired! Big Hugs ~ Dawna
Sunday, August 24, 2014
"Vintage Dress Form Mirror for Goodie Bag Swap

Hi Friends,
This is the next post I'm making to share all the pretties I created and collected for a Goodie Bag Swap that Martica is hosting at scrapbook.com. Please refer to the "Life Doesn't Have to Be Perfect to Be Wonderful" Tag Post for complete swap details.
This is a 10 item secret sister swap, which is not only a large swap, but lots of fun since I already know my secret sister! This mirror is for category #7 the vintage altered item.
My secret sister loves shabby chic, vintage and in particular dress forms. So I thought she might enjoy a mirror that she can display wherever her heart desires. The vintage shabby chic frame holder is part of this gift, so she has the option of setting it on a table top or she can hang it.
Here's a few close up pictures I hope you enjoy:
 |
| Upper Corner Flower Cluster |
The flowers are handmade using pearlized hot pink cardstock and Donna Salazar's Tattered Flower and Leaf Dies. The hip rose buds are from Wild Orchards and the ornate corner chipboard is from Dusty Attic. I Gessoed the chipboard so its a simple white matte finish. The pearl brads are from Michael's. The background paper is from Teresa Collins "Sweet Afternoon" designer paper collection.
 |
| Vintage Pearl Chandelier Close Up |
This vintage chipboard chandelier is also from Dusty Attic. I used Gesso as a base-coat, then finished it off with Liquid Pearls in White and Ruby Red. I added a matching satin bow and hung a few small strings of iridescent pearls.
 |
| Vintage Dress Form |
This beautiful vintage dress form comes from Blue Fern Studio's and really dresses up this simple mirror. I used the same media process for this as I did for the chandelier with the only difference being that I backed it using a basic pink cardstock so it wouldn't get lost in the patterned paper.
 |
| Lower Corner Flower Cluster |
This flower cluster is the same as the one described above. I used green patterned paper from Graphic 45's Country French paper collection to create all the leaves and love the embossed effect (even though it doesn't show in these pictures).
Well friends that's it for this post. Thank you so much for dropping by and may I hope you're enjoying a perfectly wonderful day! Big Hugs ~ Dawna
Monday, August 18, 2014
Botanical Tea Shabby Chic Clock

Dawna here with a lovely clock I created for my very sweet and talented friend, Glenda (aka ILOVEPAPILLONS) at scrapbook.com. Glenda adores shabby chic, which is still somewhat new to me, but I wanted to try my hand at something she would enjoy displaying in her new scraproom.
I loved Graphic 45's Botanical Tea paper collection and when I saw Blue Fern's "Floral Clock," I knew right away I wanted to use them to make Glenda a shabby chic clock.
As a base I used Dusty Attic's 8x8 shadow box from their 2013 CHA release. And, I recently won a goodie bag from Martica at scrapbook.com in a recent Tag Challenge she hosted and received this lovely 4" long swirly white lace. I knew it would be the perfect finishing touch for Glenda's project. Thank you Martica!
Glenda always has a kind word and is always encouraging others around her. She is very creative and always inspires me with her beautiful creations. I've really enjoyed getting to know Glenda better this past year and appreciate having her in my life very much. Her family roots are in South Africa and she currently lives in beautiful sunny FL with her husband. She's an empty nester, like me, so we spend time enjoying our family, friends and creating.
Glenda loves her new clock and promises to find a perfect place to display it in her new scraproom. Here's a few more close ups I hope you enjoy:


Well friends that's it for me this morning. For a complete list of products used on this project, please feel free to visit my gallery, Dawna's Place on scrapbook.com. Thank you for dropping by and may I wish you all a happy day! Big Hugs ~ Dawna
Subscribe to:
Posts (Atom)