Showing posts with label Scrap Smart. Show all posts

Friday, April 3, 2015

Romantic Parisian Inspired Envelope Mini Album

Morning Friends,


Today I'm sharing this pretty vintage style envelope mini album I created for my dear friend Susie (aka Scrap Smart) in a swap being hosted by Ilovepapillons at sb.com.  Susie loves all things vintage and feminine so I decided to use a mix of two of my favorite paper collections (Prima's Romance Novel and Marion Smith's Garment District) to make her this romantic vintage style, Parisian inspired envelope mini album.  
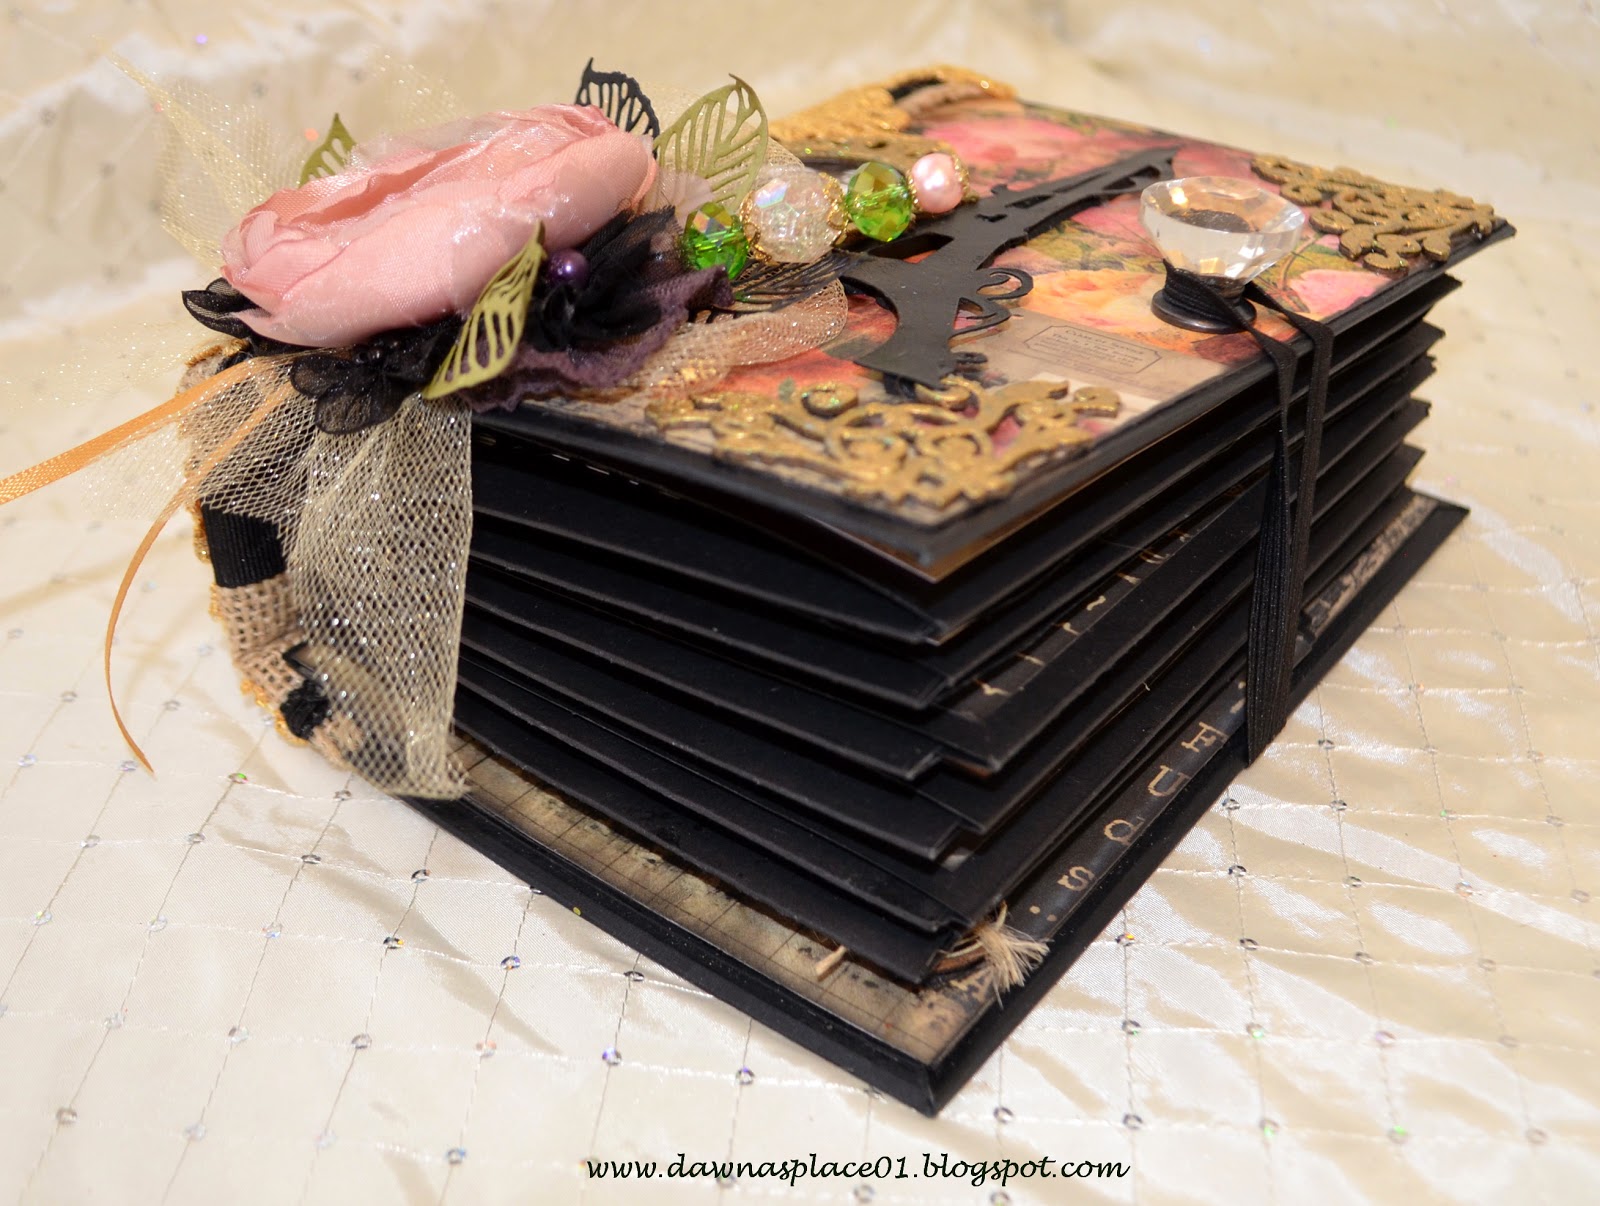
Side view of envelopes and cards assembled
The album cover measures 8x6 with a 3 inch spine.  The envelope pages were created using 6 each standard A7 black envelopes.   And the photo wallets with photo waterfalls were created from the A7 cards.  Once assembled there is enough room for 54 matted photos, and 23 journaling tags.  That's plenty of room for Susie to document whatever her heart desires!  
Finished Envelope Pages with File Folder Photo Wallet Cards
To create the envelope pages, the envelope flaps were sealed closed first.  Then all four sides were trimmed down by 1/8." The front and back of the envelopes were covered with distressed paper leaving a 1/4" frame.  Then I closed up the top and bottom of each envelope by scoring a 3" wide strip cardstock in half, punching it with a Martha Stewart daisy edge punch.  I burnished the fold then sandwiched the open envelope ends back together by gluing the daisy strips to the outside of the envelopes to close them back up.  This allowed the photo wallets to fit snugly into their envelopes without any slop.  The punched  bottom boarders double as stops for the journaling tags and the decorated burlap belly bands hold the tags safely in place.   Finely, the remaining open envelope bottoms were secured with score tape over the spines hidden hinge binding system.    The only opening left is the outside for holding the photo card wallets in place. 
  Envelope Pages Sandwiched Back Together with Daisy Punch Strips
The photo wallets were created from the A7 cards.  I used the We Are Memory Keepers Envelope Punch Board tool to create two sets of three staggered file folder tabs for words.  I left the left side of the cards straight so they fit flat and evenly inside their envelopes against the hidden hinge. 
Outside File Folders with Word Tabs
Inside File Folders with 3 Tier Photo Waterfalls
Photo Card Wallet out of its Envelope
I covered the left inside of the cards, front and back outsides with distressed paper leaving a 1/4" frame (see above).  The right inside of the photo card wallet features the 3 tier photo waterfall (also, see above). 
File Folder Tabs Facing Spine
When the cards are in their envelopes, the tabs face towards the spine (see above) to prevent the tabs from getting tattered by the elastic loop closure or by repeated use (see below).  
Elastic Loop Closure
Now that you have a good idea of how the album was created, lets look through its lovely pages:
Page 1 Folded Out
Page 2 Folded Out
Page 3 Folded Out
Page 4 Folded Out
Page 5 Folded Out
Page 6 Folded Out
Inside of the Back Cover
The inside back cover has a large deep pocket which has been popped up with foam tape to create enough depth to hide the metal tip of the elastic closure loop.  The outside of the back cover is sweet and simple:
Back Cover
Now lets have a closer look at the front cover:
Front Cover
The front cover features a sweet picture of Susie and her dear husband in the foreground of the Eiffel Tower.  The wooden frame and chipboard corners were embossed with gold to go with the gold lace covering the album spine.  A pretty crystal knob and elastic loop act as a closure to keep everything nice and neat,    The cover was embellished by layering a vintage Prima flower, with Prima's filigree leaves, a few black Prima bumper flowers, a gold tulle bow, gold ribbon, and a handmade stickpin.    
Finished Spine
The spine is decorated by layering it with burlap, black ribbon and has a back to back layer of gold Venice lace.  As a final touch, a chunky brass charm adorns the spine with Parisian and vintage inspired tassels, chains and trinkets.  
Chunky Charm Close Up
Well friends that's it for me today.  Wishing you all a wonderful Good Friday!  Until next time, create something beautiful from your heart and choose to live your  life inspired!  Big Hugs ~ Dawna 


Saturday, September 6, 2014

August Britday Card Club

Hi Friends,

Three of my friends from our birthday card club enjoyed birthdays in August.     First up is Susie Martin's or (aka scrapsmart) card which is featured above.  I used the Botanical Tea collection from Graphic 45 to create this pretty little card.  I layered the pretty rose card, gave it a peak a boo curl with some tucked in lace and pearls, and ruffled some lace around the pink flower.  Distressed the edges, popped up the card, and added a few embossed leafs for a finishing touch.  For the inside, I dd a little fussy cutting and punching here's what you get:
 
Then below is Heather's pretty pink flower and heart card.  Kathy taught these cards at our card class and I loved them!  So sweet, I knew my friends would love them too.  Which they did.
 Then this pretty soft purple lattice work card when to my pal Sandra.  I love the softness of this pretty card.  And it has the added surprise of a card within a card for your sentiment. 


Well friends that's it for my August Birthday Club.  Hope you have a wonderful day and may I wish you all a happy day!

Monday, August 18, 2014

Frienship Canvses from Susie

Sometime ago I posted a Mad Hatter Printer Tray I created for my friend Susie (aka scrapsmart) at scrapbook.com for a friendship swap we did earlier this summer.  I received these earlier this summer, but between vacation and other commitments,  I'm FINELY getting a chance to share the beautiful canvases she created for me.  I just love and adore them!  I absolutely love soft feminine styles, like shabby and vintage and aqua is my favorite color palette so Susie totally knocked this one out of the park!   Here's a couple more close ups that I hope you enjoy:

Well friends that's it for me today.

Thank you so much for these lovely gifts Susie, I'll cherish them for many, many, many years to come!   I am sorry for taking so long getting them up to share but believe me when I say your friendship brightens my day and warms my heart today and everyday!   Thank you for all your support, inspiration, kindness and encouragement.   I'm so glad you happened to me!   Big hugs and lots of love!  ~ Your Friend Always ~ Dawna

Wednesday, May 28, 2014

Creative Journey - Mad Hatter Printer Tray

Creative Journey - Mad Hatter Printer Tray
Morning Friends,

Today I'm sharing a gift I made for my very sweet friend from Nebraska, Susie (aka Scrap Smart) from scrapbook.com.   Susie and I have become friends over the past few years and last year we were in a swap together.   She made me something so special it really lifted my spirits during a difficult time.   I really wanted to do something nice for her in return.   

Susie is very creative, adventurous, fun and loves both simple shabby chic and vintage styles.  When I saw this adventurous Mad Hatter paper collection by Marion Smith, I knew it was perfect for her project.  Susie has been patiently waiting for the weather to warm up so she can paint and decorate her new craft room.   I wanted to do something that she could display, that was fun and would make her smile.  Well, according to her, I succeeded on all accounts, she loves it!  And, that couldn't make me happier!

Here's a few close-ups of Susie's Mad Hatter Printer Tray titled "Creative Journey:" 

Title Plate, Stencil Work & Top Half Close Up
Metal Flower Cluster, Stencil Work & You Inspire Me Friend Box

Left Side Close Up
There is a place ... & Dream, Discover & Embrace Box

Hanging Trinkets & Vintage Door Knocker Close Up
Little Deeds & Its Always Tea Time Boxes
I'm so happy that Susie loves her fun tray.   I love it too because it silly sayings and whimsy remind me of how the creative process works.  Which is why I titled it "Creative Journey."  Like Alice's big adventures, it makes me smile too.  

Well friends that is it for me this morning.  I hope you enjoyed this fun piece.  Thank you for dropping by today.   For those of you who have a few minutes to leave a comment, thank you very much.  I always appreciate hearing from you.   Create something from the heart and make it a special day!   Big Hugs ~ Dawna

Wednesday, May 29, 2013

Steampunk Debutante "Anything Goes" Mason Jar Swap

 Hi Friends,

Today I'm sharing a wonderful jar I created for my secret sister, Scrapwritter aka Bren, in an "Anything Goes" mason jar swap at scrapbook.com.   My inspiration for this creation came from my own sweet friend and secret sister in this swap, Scrap Smart aka Suzie Miller.  Her beautiful creation can  be viewed up close at:  http://www.scrapbook.com/myplace/index.php?mod=galleries&u=234817&m=view&id=3905919&type=-1

I loved the iridescent effect on Suzie's jar which was created by using Modge Podge Gold Finish.  I didn't realize that Modge Podge came in different finishes, but it apparently does.  Rather than go out and purchase a ready made finish, I simply add gold glitter to my base and that worked out just fine. 
www.dawnasplace01.blogspot.com

This side of the canister showcases Prima's beautiful Queen Mary zipper flowers and plenty of gears, metal flowers and trinkets for finishing touches.  For a listing of supplies and embellishments, please go to my gallery at:  http://www.scrapbook.com/galleries/641373/view/3949047/-1/0/1.html


To create this jar I cut out my images first, then used plan matte finish Modge Podge to apply them to the jar.  Once I secured all my images, I sealed them with my glittered mixture.  Next I added all my embellishments layering items along the way for lots of texture.  Then I gave everything a finishing coat of gilttered Modge Podge which gave everything an amazing sparkle.  I finished up by tying various ribbons around the mouth of the jar and hung chain with several different keys and trinkets fastened to the chain.
 

 To create the dots I used Ranger inks Perfect Pearls in aqua, silver and bronze.   I added some old antique gold buttons I had stashed and used several Tim Holtz metal muse charms and embossed some grunge board flourishes around the corners. 
www.dawnaplace01.blogspot.com
Even though our swap was for a mason jar I really wanted something slightly larger for scrapbook embellishment storage.  While rummaging about the thrift shops in Palm Springs, CA, I found this old canister.  It's just what I had in mind and worked perfectly for stuffing with goodies for my secret sister.   I'm always finding something wonderful to alter at the thrift and antique shops so I'm always on the lookout for something inspiring. 

These images come from an older Graphic 45 paper collection called Steampunk Debutante.  It's always been one of my favorite collections with its romantic images of beautiful self empowered women.   I find them feminine yet intelligent and mysterious with all their gears turning around in their heads.   Beauty and brains what more could any women ask for!

www.dawnasplace01.blogspot.com
 
The top separates nicely from the canister for easy storage and has been embellished using Prima's new zipper flower, bronze antique lace, chipboard, metal flowers, heart locket, vintage buttons, mulberry roses, cherry blossoms, muse charms, and filigree metal flowers with contrasting gem stone centers.  I went a little crazy with all the eclectic decorations, but hey, it was an "Anything Goes" swap -  how could I resist! 

In my mind, no altered project is complete unless its adorned wtih hanging charms.  I don't quite understand my attraction to them, but I just love to pile them on.  In this case I chose to use all bronze metal and added a few Tim Holtz word keys (Secret & Love), closure hook, pretty lace chain, an adorable luggage charm a very unique spiral paper clip which I found at my local Micheal's store.
 

Well friends that's it for me today.  Thank you so much for dropping by my blog and having a peek today.   If this is your first visit, please feel free to join this site if your a blogger or if your not, feel free to sign up for email notices so you can ee what's next. 

I always love hearing from you, so if you enjoyed today's post please feel free to leave me a comment.  I always love hearing from you and appreciate your encouraging words!  Wishing you all a wonderful week.  Until next time, be creative and live live life inspired!  ~ Dawna